
Pumpkin Painting Ideas
Why Choose Painting Over Carving This Year?
If you have ever spent an hour scooping out pumpkin guts, you know how messy it can be. Easy pumpkin painting ideas are perfect for parents with young children because they are much safer. You don’t have to worry about little fingers near sharp blades. Instead, kids can use sponges, brushes, or even their fingers to create art. It is a stress-free activity that focuses on the joy of creation rather than the cleanup. Plus, a painted pumpkin stays solid, which prevents that sad, shriveled look that happens to carved pumpkins after just a few days in the sun.
Another great reason to paint is the level of detail you can achieve. It is very hard to “carve” a realistic portrait or a complex floral pattern, but with a fine-tip brush, anything is possible. You can match your pumpkins to your home’s interior design or even create a theme based on your favorite movies. From metallic gold to soft pastels, the color palette is infinite. We believe that everyone has an inner artist, and a smooth pumpkin surface is the perfect canvas to let that artist come out and play.
Meet the Expert Decorator
| Feature | Details |
|---|---|
| Artist Name | Sarah “Autumn” Miller |
| Specialty | Seasonal Home Decor & DIY Crafts |
| Experience | 12+ Years in Professional Design |
| Favorite Tool | High-Pigment Acrylic Paints |
| Top Tip | Always seal your pumpkin with a clear coat! |
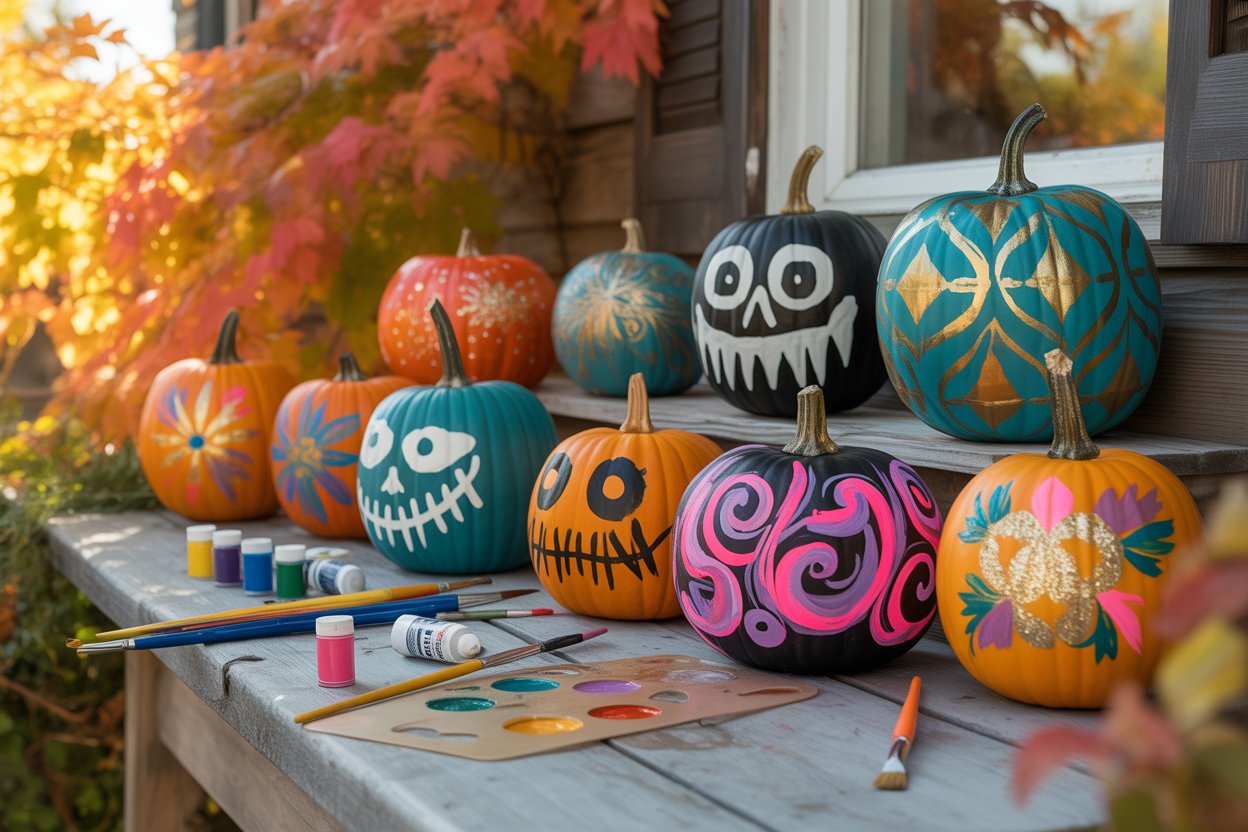
Getting Started: Materials You Will Need
Before you start searching for cute pumpkin painting ideas, you need to gather the right supplies. You don’t need to spend a lot of money to get professional results. Start with a set of acrylic paints because they dry quickly and stay bright. You will also want a variety of brushes, including flat brushes for large areas and tiny pointed brushes for the small details. Don’t forget a cup of water to wash your brushes and some paper towels to dry them off. Having everything ready on your table will make the process much more relaxing and fun.
Preparation is the secret key to a long-lasting design. Before you put any paint on the pumpkin, wipe it down with a damp cloth to remove dirt and let it dry completely. Some people even like to use a matte primer spray first. This helps the paint stick better to the waxy skin of the pumpkin. If you make a mistake, don’t worry! One of the best things about paint is that you can just wait for it to dry and then paint right over the top of it. It is a very forgiving way to express your holiday spirit.
Easy Pumpkin Painting Ideas for Beginners
If you are new to this, start with simple geometric shapes. You can use painter’s tape to create perfect stripes or chevrons. Just stick the tape on, paint the open spaces, and peel the tape off once the paint is dry. This creates a very clean and modern look. Another one of the most easy pumpkin painting ideas is the “polka dot” method. Use the eraser end of a pencil or a round sponge dabber to make uniform dots all over the surface. It looks stylish and takes almost no time at all to finish.
Drip painting is another “no-skill-required” technique that looks amazing. Simply tip a bottle of paint over the top of the pumpkin near the stem and let the colors run down the sides. You can layer different colors to create a rainbow effect. As the paint drips and dries, it forms unique patterns that look like modern art. This is a favorite for kids because it is messy in a fun way and always results in a cool, abstract design. You really can’t mess this one up, which makes it a great confidence booster!
Cute Pumpkin Painting Ideas to Brighten Your Porch
When we think of cute pumpkin painting ideas, we often think of animals. You can easily turn a round pumpkin into a happy cat, a round owl, or even a magical unicorn. For a unicorn, paint the whole pumpkin white, add some rosy pink cheeks, and use a gold ice cream cone as a horn. Adding “extra” items like felt ears or googly eyes can bring your character to life. These friendly faces are much more welcoming for trick-or-treaters than a scary, toothy grin.
Donut pumpkins are also a huge trend right now. Paint the top half of your pumpkin with a “frosting” color like soft pink or chocolate brown. Then, add colorful little lines for sprinkles. It looks delicious and very whimsical! Another cute idea is to paint pumpkins to look like giant pieces of fruit, such as strawberries or pineapples. Using bright colors and cheerful patterns makes your fall decor feel happy and lighthearted. These designs are perfect for indoor displays on a dining table or a fireplace mantel.
Exploring Floral Themes: Purple Flowers Names and Pictures
Many people are moving away from traditional orange and looking toward nature for inspiration. If you love gardening, why not paint flowers on your pumpkin? You might find yourself searching for purple flowers names and pictures to find the perfect reference. Purple is a royal and sophisticated color that looks stunning against a white or silver pumpkin base. You could paint large, bold Lavender sprigs or delicate Violets. Seeing these colors together creates a very elegant aesthetic that works well throughout the entire autumn season.
Popular Purple Flowers for Pumpkin Painting
-
LavenderLong, thin stalks with tiny buds. Perfect for creating elegant vertical designs along the sides of your pumpkin.
-
LilacClusters of small, fragrant blossoms. Creates beautiful clustered floral arrangements.
-
PetuniaWide, trumpet-shaped petals. Great for bold, colorful statements on your pumpkin canvas.
-
AsterStar-shaped flowers that bloom in late fall. Perfect for seasonal-themed pumpkin designs.
-
IrisComplex petals with a very regal look. Ideal for more advanced painters wanting a challenge.
-
VioletsSmall, round flowers with heart-shaped leaves. Perfect for delicate, detailed work.
Imagine painting these blooms in a ring around the top of your pumpkin. It creates a “flower crown” effect that is both beautiful and unique. You can mix and match different purple flowers to create a cascading garden effect down the side of your pumpkin.
Detailed Table: Common Purple Flowers for Inspiration
| Flower Name | Style | Skill Level |
|---|---|---|
| Lavender | Tall & Thin | Easy |
| Violets | Small & Round | Medium |
| Lilacs | Clusters | Hard |
| Orchids | Exotic & Flowy | Very Hard |
| Pansies | Large Petals | Medium |
Stardew Valley Fans: How Many Purple Flowers are on Ginger Island?
For the gamers out there, you might want to bring a bit of your favorite virtual world into real life. If you have played Stardew Valley, you might wonder, “how many purple flowers are on ginger island?” This is a fun trivia point because the island is filled with tropical colors. On Ginger Island, you will mostly see the vibrant purple Ginger flowers. While the exact count can change depending on where you walk, these flowers are iconic to the island’s landscape. They provide a wonderful reference for a tropical-themed pumpkin.
Ginger Island Floral Inspiration
You can paint your pumpkin to look like a scene from the game. Use a deep green base and add those bright purple tropical blooms on top. This is a great way to show off your personality and interests. It also starts a conversation with anyone who visits your home and recognizes the reference. Using small purple flowers as accents around a pixel-art character can make your pumpkin look like a screen-to-life masterpiece. It is all about blending your hobbies with your holiday traditions.
Tips for Painting Small Purple Flowers
When you are adding detail, small purple flowers can be the perfect finishing touch. Instead of trying to paint every petal perfectly, use a technique called “stippling.” Take a small brush and tap little dots of purple and white paint in a cluster. This mimics the look of flowers like Baby’s Breath or Alyssum. It adds texture and depth to your pumpkin painting ideas without requiring you to be a professional illustrator. It is a very relaxing way to spend an afternoon.
You can also use a “comma stroke” to create tiny petals. Simply press the tip of your brush down and pull it toward the center of your flower. Repeat this five times in a circle, and you have a perfect little blossom. Adding a tiny yellow dot in the middle makes it look realistic. These tiny details make a big difference when people look at your pumpkins up close. It shows that you took your time and put love into your creation.
Step-by-Step Guide: Your First Painted Pumpkin
Pick the Right Pumpkin
Look for one with a smooth surface and no bruises. The shape should complement your design – round for faces, tall for floral arrangements.
Wash and Dry
Remove all dirt so the paint sticks properly. Use a damp cloth and allow to dry completely before starting your painting project.
Sketch Your Design
Use a washable marker or a pencil to lightly draw your plan. This is your roadmap to a successful painted pumpkin.
Base Coat
Paint the entire pumpkin one solid color and let it dry. This creates a uniform canvas for your detailed artwork.
Add Details
This is where you use your cute pumpkin painting ideas. Work systematically from background to foreground elements.
Seal the Deal
Use a spray-on clear sealer to protect your art from the weather. Apply in a well-ventilated area and allow to dry completely.
Creative Ideas for All Ages
Painting is an activity that bridges the gap between generations. Grandma can sit down with her grandkids and everyone can work on their own project. For seniors, painting can be very therapeutic and a great way to keep the hands moving. For children, it is a way to explore colors and textures. You can even host a “Pumpkin Painting Party” where friends bring their own pumpkins and you provide the paint and snacks. It is a wonderful way to build community and celebrate the change of seasons together.
If you want to try something really different, use glow-in-the-dark paint! This makes your easy pumpkin painting ideas look cool even after the sun goes down. Imagine a porch filled with glowing stars, moons, or spooky ghosts. You don’t need a candle inside to make your pumpkin shine. This is also much safer than leaving a burning flame unattended on your wooden porch. It is smart, stylish, and very fun for the whole family.
My Personal Experience with Pumpkin Art
I remember the first time I tried painting a pumpkin instead of carving it. I was a bit nervous that it wouldn’t look “traditional” enough. However, once I finished a beautiful teal pumpkin with gold leaves, I was hooked. It lasted for two months! I didn’t have to deal with fruit flies or that “rotting pumpkin” smell that usually fills the air by late October. Since then, I have experimented with everything from chalkboard paint to lace overlays. Every year is a new adventure in creativity.
One of my favorite memories was helping my nephew paint a “Spider-Man” pumpkin. He was only four years old, and he was so proud that he did it “all by himself.” We used easy pumpkin painting ideas like using a sponge for the red base and a black marker for the webs. Seeing the joy on his face reminded me that holiday decor isn’t about perfection; it is about the memories we make while creating it. That is the true spirit of the season.
Instagram Inspiration: Seeing Art in Action
Check out this amazing video for some visual inspiration! [Insert Placeholder for Instagram Video Link: Imagine a reel showing a time-lapse of a pumpkin being transformed into a floral masterpiece with purple flowers.]
Watching someone else work can give you great ideas for brush strokes and color blending. Social media is a goldmine for pumpkin painting ideas. You can see how people use everyday items like toothbrushes to “splatter” paint for a starry night effect. Don’t be afraid to take a design you see online and add your own twist to it. Art is all about taking inspiration and making it your own.
Frequent Questions About Pumpkin Painting
A: Acrylic paint is the best choice. It covers the pumpkin’s waxy skin well, dries fast, and is water-resistant once dry. For best results, choose high-quality acrylic paints with good pigmentation.
A: Make sure the pumpkin is dry before painting and apply a clear acrylic sealer spray after you finish your design. Keep it out of direct rain if possible. Store indoors when not on display to extend its life.
A: Yes! Some people paint a face and then carve out the eyes or mouth for a mixed-media look. Just be careful not to chip the paint while cutting. Use a sharp craft knife and cut slowly.
A: Lavender and Pansies are the easiest. Lavender is just a series of dots on a line, and Pansies have large, simple petals that beginners can easily manage.
A: Absolutely! Permanent markers or paint pens are excellent for easy pumpkin painting ideas and give you a lot of control. They’re less messy and great for detailed designs.
A: It is usually best to leave the very bottom unpainted so the pumpkin can “breathe,” which helps prevent it from rotting too quickly. However, if displaying on a stand, you can paint it for a finished look.
Start Your Creative Journey Today!
Pumpkin painting is more than just a craft; it is a way to celebrate the beauty and color of autumn. Whether you choose cute pumpkin painting ideas or elegant floral patterns with small purple flowers, the most important thing is to have fun. You don’t need to be a professional artist to create something that looks wonderful on your doorstep. Grab a pumpkin, some brushes, and let your imagination run wild this year!
We hope this guide has given you plenty of inspiration to try something new. From the tropical vibes of Ginger Island to the classic beauty of a purple flower garden, your pumpkins can tell any story you want. So, what are you waiting for? Head to the patch, find the perfect gourd, and start painting!
You Might Also Like: Newfoundland Dog Breed Guide